Deploying thermal cameras in live monitoring requires matching sensor specifications, mounting positions, and AI analytics to each site’s unique security needs. Done correctly, thermal technology delivers reliable 24/7 threat detection independent of lighting, weather, or visual camouflage.
This guide covers thermal camera fundamentals, equipment selection, strategic positioning, AI-powered analytics integration, network connectivity, environmental performance, common deployment mistakes, and ongoing maintenance.
Thermal cameras detect heat in the long-wave infrared spectrum rather than reflected light, producing clear threat outlines in total darkness and through camouflage. Two thermal units can replace 10 to 12 optical cameras on a 400-meter perimeter, fundamentally changing coverage economics.
Choosing the right equipment means balancing resolution (256×192 through 1280×1024), thermal sensitivity measured as NETD, lens focal length for short or long-range zones, IP-rated housings, and cooled versus uncooled sensor types. Each specification directly affects detection reliability at a given distance.
Positioning cameras at elevated mounting points with steep downward angles and fields of view perpendicular to intruder movement maximizes detection probability while reducing false alerts. Maintaining 10% to 15% field-of-view overlap between adjacent units eliminates blind spots.
Pairing thermal feeds with AI-powered video analytics reduces false alarms by up to 90%, letting operators focus on verified incidents. Proper threshold configuration, scene-based calibration, and classification-first logic are essential to achieving that reduction.
Seasonal shifts in ambient temperature, humidity, and precipitation alter thermal contrast throughout the year. Routine lens cleaning, quarterly recalibration, and structured walk-tests keep detection accuracy consistent across changing conditions.
Why Are Thermal Cameras Essential for Live Security Monitoring?
Thermal cameras are essential for live security monitoring because they detect heat signatures rather than visible light, enabling reliable threat detection in complete darkness, through camouflage, and across large perimeters. The following sections cover how thermal technology differs from standard cameras, which unique threats it detects, and when it outperforms conventional surveillance.
How Do Thermal Cameras Differ From Standard Visible-Light Cameras?
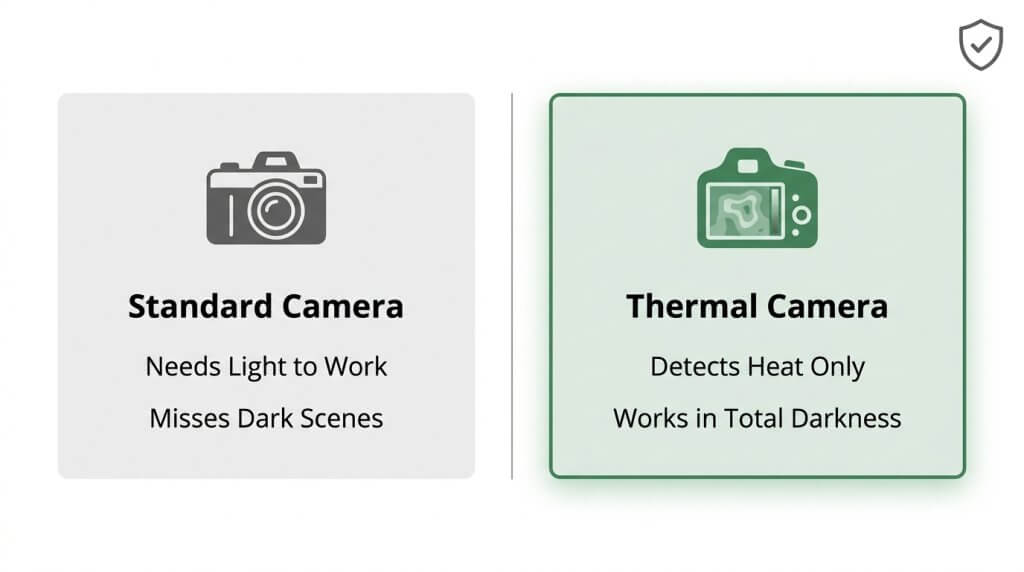
Thermal cameras differ from standard visible-light cameras by detecting heat emitted by objects, whereas visible-light cameras detect reflected light, much like the human eye. Thermal imaging cameras operate in the long-wave infrared (LWIR) spectrum, covering wavelengths from 8µm to 15µm, a range invisible to conventional sensors.
Key differences include:
- Detection method: Thermal sensors read radiated heat; optical sensors require ambient or artificial light to produce an image.
- Visibility independence: Thermal cameras produce a clear outline of a potential threat in total darkness and through camouflage as accurately as on a bright sunny day, according to Axis Communications.
- Resolution range: Infrared resolutions span from 256×192 and 384×288 to high-definition formats like 1280×1024, generally lower pixel counts than optical cameras but purpose-built for contrast-based detection.
- Sensitivity: Ratings below 50mK suit standard security applications, while ratings below 20mK are considered excellent for detecting subtle temperature differences.
- Longevity: Uncooled thermal cameras offer longer lifespans and better long-term stability because they eliminate mechanical cooling systems.
- Cost efficiency: Two thermal cameras can secure a 400-meter perimeter, replacing 10 to 12 traditional optical cameras and significantly reducing total cost of ownership.
For live monitoring operations, this combination of light-independent detection and broader coverage per unit makes thermal technology a fundamentally different tool, not merely an upgrade to standard CCTV.
What Types of Threats Can Thermal Cameras Detect That Other Cameras Cannot?
The types of threats thermal cameras can detect that other cameras cannot include concealed intruders, vehicles approaching in zero-visibility conditions, and perimeter breaches at critical infrastructure sites regardless of lighting. Because thermal sensors read body heat and engine warmth, threats that blend visually into their surroundings remain fully visible on a thermal feed.
Specific detection advantages include:
- Camouflaged or hidden intruders: Body heat creates a distinct thermal signature even when a person hides behind foliage or wears dark clothing at night.
- Vehicles approaching without headlights: Engine and tire heat register clearly on infrared sensors long before an optical camera could capture usable detail.
- Perimeter breaches at unmanned sites: According to FLIR, thermal cameras detect approaching people or vehicles that pose a threat to critical infrastructure sites regardless of lighting conditions.
When paired with AI analytics, a fusion approach strengthens results further. Thermal AI cameras deliver consistent detection under challenging conditions, while visible analytics provide rich contextual detail for verification. This layered capability catches threats that would pass unnoticed by optical-only systems.
When Does Thermal Imaging Outperform Conventional Surveillance?
Thermal imaging outperforms conventional surveillance in low-visibility environments where optical cameras lose effectiveness. Complete darkness, heavy fog, smoke, glare, and scenes with minimal visual contrast all degrade standard camera performance while leaving thermal detection largely unaffected.
Specific scenarios where thermal dominates include:
- Nighttime perimeter protection: No supplemental lighting is required, eliminating both the cost and the tactical disadvantage of illuminating a secured area.
- Large, unmanned perimeters: Thermal cameras protect distances where stationing guards is impractical, covering hundreds of meters per unit.
- Adverse weather: Although humidity absorbs some infrared radiation before it reaches the sensor, thermal cameras still outperform optical systems in rain, fog, and low-cloud conditions.
- High-clutter environments: Scenes with busy visual backgrounds, such as industrial yards or wooded fence lines, produce cleaner threat signatures on thermal than on optical feeds.
In practice, the strongest security posture combines thermal and visible-light cameras rather than relying on either alone. Thermal imaging handles detection; optical cameras supply the visual detail needed for identification and evidence. Understanding when each technology leads helps teams design monitoring systems that minimize blind spots across all conditions.
How Do Thermal Cameras Work in a Security Monitoring Context?
Thermal cameras work in a security monitoring context by detecting infrared radiation emitted by people, vehicles, and objects, then converting that heat data into a visible image for operators. The subsections below explain the role of long-wave infrared radiation, how security images are generated, and what resolution and sensitivity specifications mean.
What Is the Role of Long-Wave Infrared Radiation in Thermal Detection?
The role of long-wave infrared radiation in thermal detection is to provide the specific band of heat energy that thermal sensors capture to distinguish objects from their surroundings. Thermal imaging cameras typically utilize the LWIR spectrum, covering wavelengths from 8µm to 15µm, according to a Hanwha Vision whitepaper. This wavelength range matters because all objects above absolute zero emit infrared energy, and LWIR corresponds to the peak thermal emission of room-temperature objects like human bodies, vehicles, and building surfaces. Because LWIR detection relies on emitted heat rather than reflected light, it functions identically in total darkness, bright daylight, and visually obscured conditions. This independence from ambient lighting is what makes the LWIR band foundational to 24/7 security monitoring.
How Does a Thermal Camera Generate a Usable Security Image?
A thermal camera generates a usable security image by focusing incoming infrared radiation through a germanium lens onto a microbolometer sensor array. Each pixel in the array absorbs infrared energy, causing a measurable change in electrical resistance proportional to the temperature of the corresponding point in the scene. Signal processing electronics then map these resistance values to a color palette or grayscale gradient, producing a thermogram that operators can interpret on a monitor. Aligning thermal images with visible-light feeds presents unique challenges due to differences in field of view, resolution, and sensor properties, which is why proper calibration during installation is critical. For live monitoring, this conversion from invisible heat to a visual display must happen in real time with minimal latency so operators can assess threats as they develop.
What Do Thermal Camera Resolution and Sensitivity Specifications Mean?
Thermal camera resolution and sensitivity specifications define how much detail a sensor captures and how precisely it distinguishes between objects at similar temperatures. Resolution refers to the pixel count of the sensor array, with common formats ranging from 256×192 for basic coverage to 1280×1024 for high-definition detection. Sensitivity is measured by NETD (Noise-Equivalent Temperature Difference), a figure of merit that characterizes an infrared camera system’s ability to detect small temperature differences, according to Sierra-Olympia Technologies. A sensor with a lower NETD value can resolve finer thermal contrasts between an intruder and the background. For security deployments, matching resolution to the required detection distance and selecting a sensor with adequate NETD ensures reliable threat identification across the monitored zone.
With these technical foundations established, selecting the right thermal camera specifications becomes the next practical decision.
What Should You Consider When Choosing Thermal Cameras for Live Monitoring?
You should consider resolution, thermal sensitivity, lens focal length, environmental durability, and sensor type when choosing thermal cameras for live monitoring. The following subsections break down each factor.
What Resolution and Thermal Sensitivity Are Needed for Perimeter Detection?
The resolution and thermal sensitivity needed for perimeter detection depend on the distance and detail required from each camera position. Common infrared resolutions range from 256×192 and 384×288 to high-definition formats like 1280×1024. Higher pixel counts produce sharper thermal images, making it easier to distinguish a person from an animal at longer ranges.
Thermal sensitivity, measured as NETD (Noise-Equivalent Temperature Difference), determines how well a camera detects subtle heat variations. A sensor with an NETD of 20 mK can detect temperature differences as small as 0.02°C. For most perimeter security applications, sensitivity ratings below 50 mK perform reliably, while ratings below 20 mK are considered excellent. Matching resolution and sensitivity to the specific perimeter length prevents overspending on short-range sites or underperforming at long distances.
Which Lens Focal Length Is Right for Short-Range Monitoring?
A shorter focal length lens is right for short-range monitoring because it provides a wider field of view for area coverage. According to FLIR’s perimeter security deployment guide, a lens with a smaller focal length delivers broader scene visibility, which is ideal for monitoring entry points, loading docks, and parking areas within approximately 50 to 150 meters.
Wide-angle thermal lenses cover more ground per camera, reducing the total number of units needed for compact sites. However, the trade-off is lower magnification, which limits the ability to identify fine details at the far edge of the frame. For short-range perimeter zones, prioritizing field-of-view width over magnification typically yields better detection coverage.
Which Lens Focal Length Is Right for Long-Range Monitoring?
A greater focal length lens is right for long-range monitoring because it increases magnification for distant target detection. Sites requiring detection at 300 meters or beyond need narrower, longer lenses that concentrate the thermal image on a smaller area with higher detail.
The trade-off is a reduced field of view; each camera covers a narrower corridor. Long-range perimeter deployments often combine a few telephoto thermal cameras with wider-angle units to balance detection depth and lateral coverage. Selecting the wrong focal length for extended distances is one of the most common deployment errors, resulting in targets that appear too small on-screen for operators or analytics to classify reliably.
How Important Is IP Rating and Operating Temperature Range?
IP rating and operating temperature range are critical because thermal cameras deployed outdoors face rain, dust, extreme heat, and freezing conditions year-round. An IP66 or IP67 rating ensures the housing is sealed against water jets and dust ingress, which protects internal optics and electronics from degradation.
Operating temperature specifications define the environmental limits within which the camera functions accurately. Installations in desert climates or northern regions need cameras rated for extremes, often from -40°C to +60°C or wider. Overlooking these specifications leads to premature hardware failure, foggy lenses, or unreliable thermal readings during the conditions when security coverage matters most.
Should You Choose Cooled or Uncooled Thermal Sensor Technology?
You should choose between cooled or uncooled thermal sensor technology based on detection range requirements and budget constraints. Cooled sensors use a cryocooler to lower the detector temperature to as low as -321°F, dramatically increasing sensitivity for long-range, high-contrast imaging. These systems excel at critical infrastructure sites where detecting small thermal signatures at extreme distances is essential.
According to Raythink Technology, uncooled thermal cameras offer a longer lifespan and better long-term stability because they eliminate the mechanical cooling system entirely. Uncooled units cost less, require less maintenance, and suit most standard perimeter security applications. For the majority of commercial sites, uncooled technology strikes the right balance between performance and total cost of ownership, while cooled models remain the better choice for mission-critical, long-range scenarios.
With camera specifications defined, proper positioning ensures those capabilities translate into reliable coverage.
Where Should Thermal Cameras Be Positioned for Maximum Coverage?
Thermal cameras should be positioned at elevated mounting points with calculated angles, overlapping fields of view, and clear sightlines. The following subsections cover optimal height, angle, overlap, and obstruction management.
What Mounting Height Optimizes Thermal Detection Range?
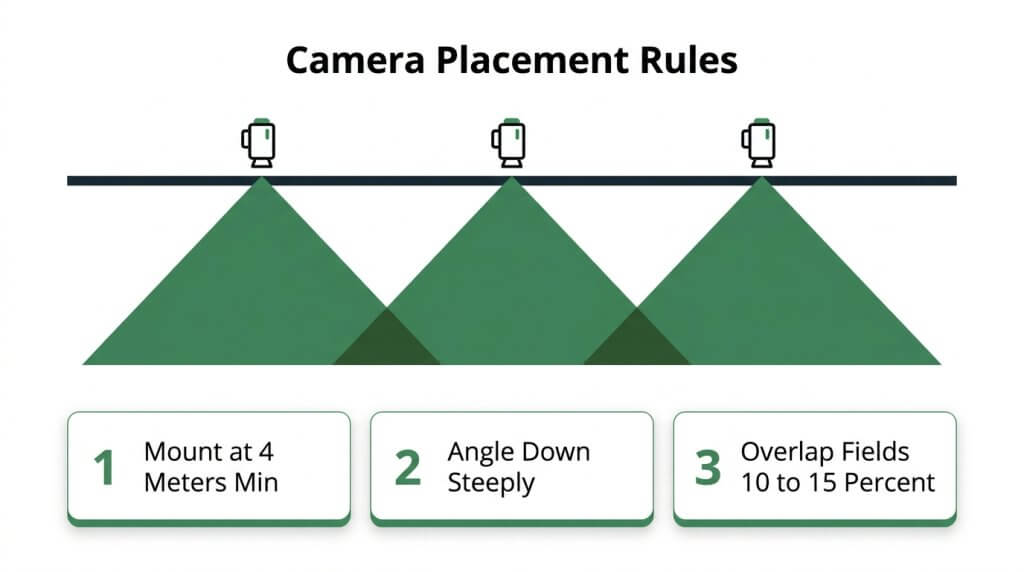
The mounting height that optimizes thermal detection range depends on the camera type and application. Fixed thermal cameras require a minimum height of 4 meters (13 feet) for adequate downward perspective. Thermal PTZ cameras perform best at greater elevations due to their longer focal lengths and wider scan arcs.
Higher mounting positions increase the detection horizon by reducing ground-level obstructions like fencing, vegetation, and parked vehicles. However, excessive height compresses the thermal signature of distant targets, making classification harder. The goal is balancing elevation with pixel density on target; a person at 300 meters must still occupy enough pixels for reliable identification. For most perimeter deployments, matching mount height to the specific lens and detection distance is more effective than defaulting to maximum elevation.
How Should You Angle Thermal Cameras to Reduce False Alerts?
You should angle thermal cameras with a steep downward tilt and a field of view perpendicular to anticipated intruder movement to reduce false alerts. According to FLIR’s perimeter deployment guidelines, cameras should be mounted at a minimum height of 4 meters (13 feet) to provide a steep “look down” angle that separates ground-level targets from background thermal noise.
Positioning the field of view parallel to fence lines and perpendicular to intruder paths maximizes the time a target spends in frame, giving analytics more data points for classification. Shallow angles cause the camera to look across heated surfaces like asphalt or rooftops, which generates thermal clutter and triggers nuisance alarms. Tilting the camera downward narrows the background scene to cooler ground surfaces, improving contrast between people and their surroundings.
What Field-of-View Overlap Is Needed Between Adjacent Thermal Cameras?
The field-of-view overlap needed between adjacent thermal cameras is typically 10% to 15% of each camera’s horizontal coverage. This overlap eliminates blind spots at the seam between two camera zones and ensures a moving target never disappears from detection, even briefly.
Without sufficient overlap, intruders can exploit narrow gaps where neither camera has reliable pixel coverage. Overlap also compensates for minor shifts caused by wind loading, thermal expansion of mounting poles, or vibration from nearby equipment. When selecting lenses, a greater focal length narrows the field of view, so longer-range cameras require closer spacing to maintain adequate overlap. Mapping each camera’s actual detection footprint on a site plan before installation prevents costly repositioning after deployment.
How Do You Account for Environmental Obstructions and Reflections?
You account for environmental obstructions and reflections by conducting a thorough site survey that maps every heat source, reflective surface, and physical barrier within each camera’s planned field of view. Common obstructions include trees, signage, retaining walls, and seasonal vegetation growth that may not be visible during initial planning.
Reflective surfaces such as standing water, metal roofing, glass facades, and polished concrete bounce infrared energy and create phantom heat signatures that trigger false alerts. Positioning cameras to avoid direct sightlines to these surfaces, or masking specific zones in the analytics software, reduces nuisance alarms significantly. Nearby heat sources like HVAC exhaust vents and transformer stations also create thermal clutter that degrades detection accuracy. Planning camera positions with seasonal changes in mind ensures consistent performance year-round, since foliage, sun angles, and surface temperatures shift dramatically across seasons.
With positioning strategies established, integrating AI-powered analytics further refines detection accuracy.
How Do You Integrate Thermal Cameras With AI-Powered Analytics?
You integrate thermal cameras with AI-powered analytics by pairing thermal feeds with intelligent video analysis, configuring precise temperature thresholds, and calibrating detection logic to minimize false alerts. The following subsections cover alarm verification, threshold configuration, and calibration steps.
What Role Does Video Analytics Play in Thermal Alarm Verification?
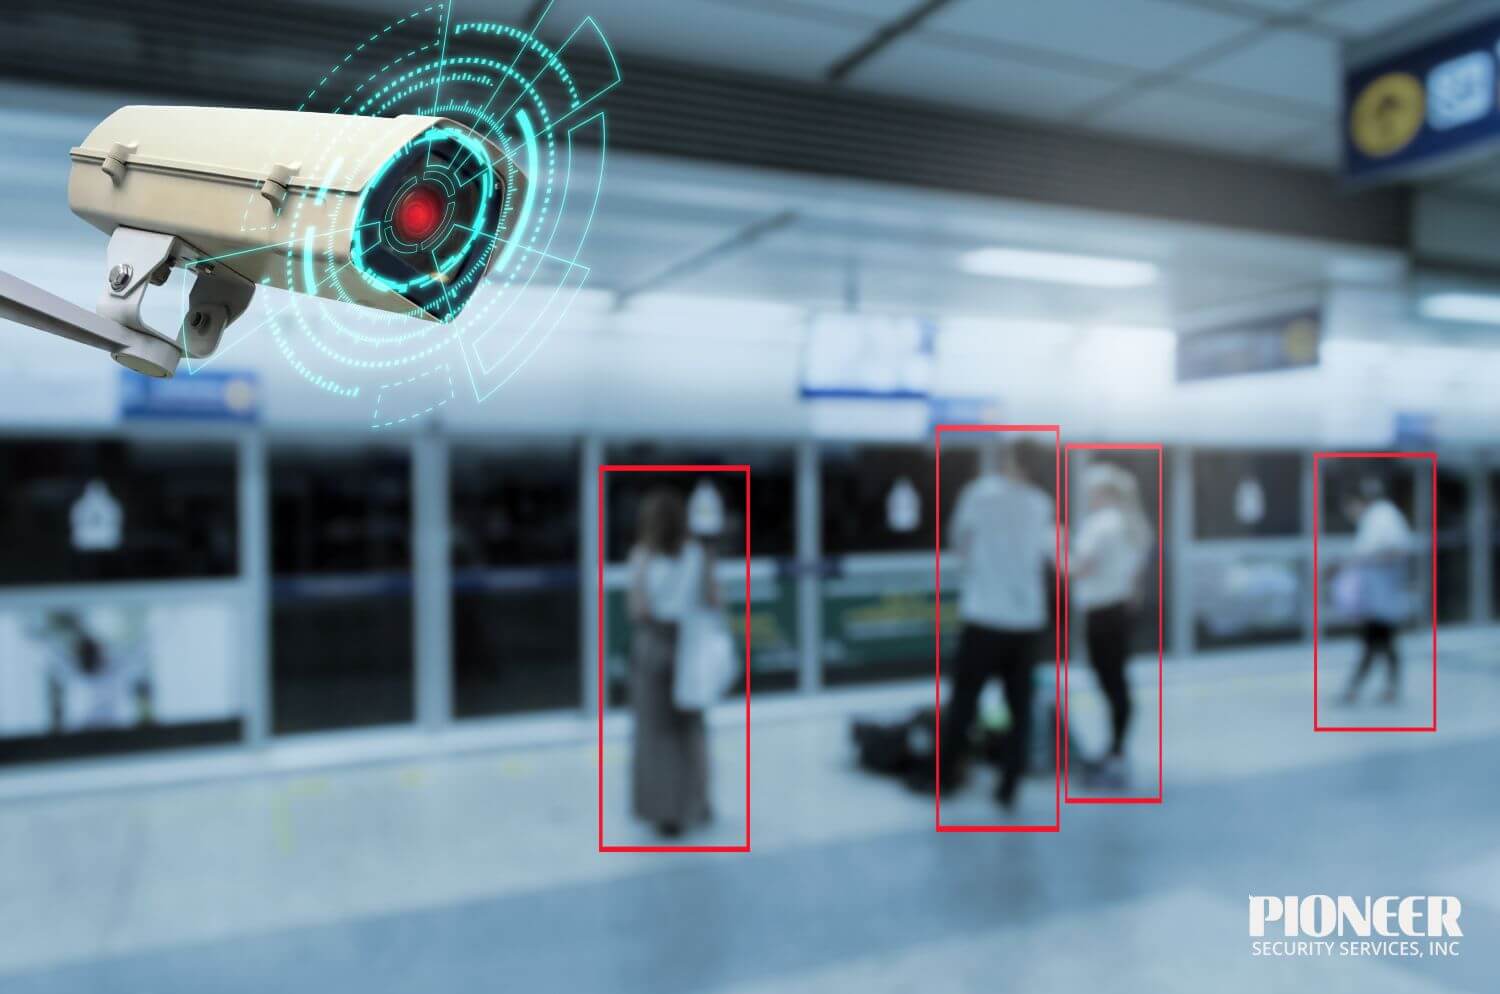
Video analytics plays a critical role in thermal alarm verification by classifying detected heat signatures before triggering alerts. Rather than forwarding every thermal anomaly to operators, AI analyzes each event to determine whether the source is a person, vehicle, animal, or environmental artifact. Only verified threats reach the monitoring team.
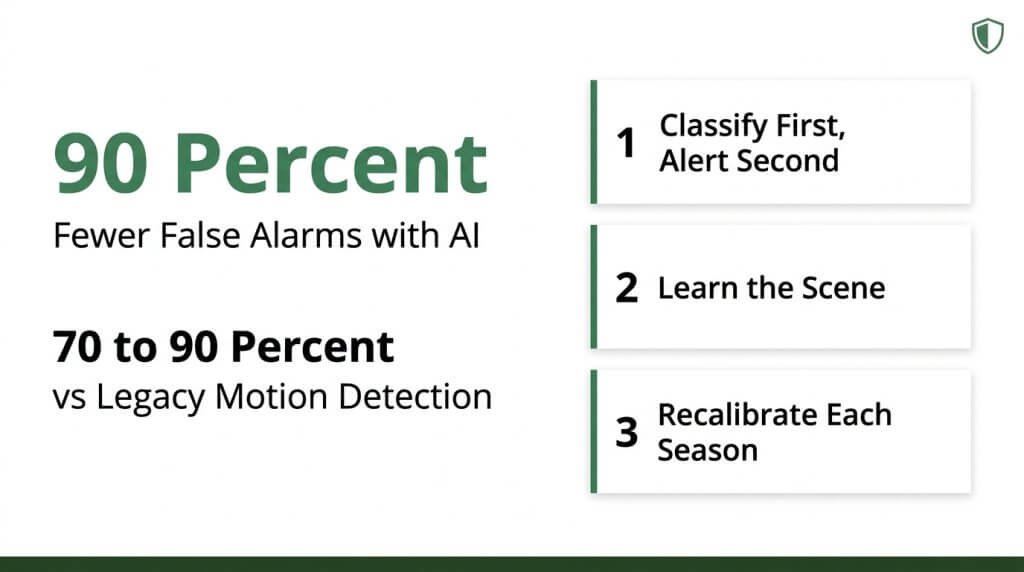
According to a 2024 report by Lumana, AI-powered video analytics can reduce false alarms by up to 90%, allowing security teams to concentrate on specific, verified incidents. This fusion approach pairs thermal consistency in darkness and adverse weather with the contextual intelligence of AI classification. For live monitoring operations, that combination means operators spend less time dismissing nuisance alerts and more time responding to genuine intrusions.
How Should You Configure Temperature Thresholds and Detection Zones?
You should configure temperature thresholds and detection zones by mapping each camera’s field of view to specific areas of concern, then setting thermal trigger points based on expected environmental baselines. Key configuration steps include:
- Define distinct detection zones for high-priority areas such as fence lines, entry points, and restricted zones.
- Set temperature thresholds slightly above ambient baseline readings to catch human-sized heat signatures without triggering on solar heating or wildlife.
- Adjust zone sensitivity independently, since a loading dock generates more background heat than an open perimeter.
- Schedule threshold profiles for day and night cycles, as ambient temperatures shift significantly between them.
Revisiting these settings seasonally prevents threshold drift from rendering detection zones either too sensitive or too permissive.
What Calibration Steps Reduce False Positives in Thermal Systems?
The calibration steps that reduce false positives in thermal systems center on object classification logic, scene learning, and scheduled recalibration cycles. Modern AI thermal systems use a “classification first, rule second” principle: the algorithm identifies whether a detected object is a person or vehicle before evaluating whether a rule violation has occurred. This approach eliminates alerts triggered by animals, blowing debris, or shifting shadows.
Effective calibration also involves:
- Running a supervised learning period where the system catalogs typical scene activity.
- Excluding known heat sources within the field of view, such as exhaust vents or machinery.
- Performing periodic recalibration after weather pattern shifts or physical site changes.
These steps contribute to AI false alarm reduction rates of 70–90% compared to legacy motion-detection systems. With calibration properly maintained, thermal analytics integration becomes a reliable foundation for live monitoring workflows.
How Should Thermal Cameras Connect to a Live Video Monitoring Center?
Thermal cameras should connect to a live video monitoring center using standardized IP protocols over dedicated, high-bandwidth network infrastructure. The subsections below cover bandwidth requirements, low-latency streaming, and redundancy measures.
What Bandwidth and Network Infrastructure Do Thermal Feeds Require?
The bandwidth and network infrastructure thermal feeds require depend on resolution, frame rate, and the number of cameras transmitting simultaneously. Lower-resolution thermal streams (256×192 or 384×288) consume less bandwidth than high-definition 1280×1024 feeds, but each camera still needs a dedicated allocation to avoid packet loss. According to SPON, ONVIF and RTSP protocols are used to find, configure, and stream live video from IP cameras to remote monitoring centers.
A robust thermal network infrastructure typically includes:
- Gigabit Ethernet or fiber backbone connecting camera clusters to the head-end.
- Power over Ethernet (PoE) switches to simplify cabling and reduce single points of failure.
- Virtual LANs (VLANs) that isolate security video traffic from general network activity.
- Quality of Service (QoS) policies that prioritize thermal video packets over lower-priority data.
Undersizing the network is one of the most common integration mistakes. Allocating bandwidth based on average throughput rather than peak throughput leads to dropped frames precisely when an incident demands clear, continuous video.
How Do You Ensure Reliable Transmission With Low-Latency Streaming?
You ensure reliable transmission with low-latency streaming by combining efficient compression, edge processing, and prioritized network paths. H.264 or H.265 encoding at the camera level reduces raw data volume before transmission, keeping latency within the one-to-two-second window that live monitoring operators need for real-time intervention.
Key practices for minimizing latency include:
- Encoding thermal feeds at the edge rather than relying on centralized transcoding.
- Using unicast streams for active monitoring sessions and multicast only for recording.
- Deploying managed switches with jitter buffers tuned for video traffic.
For sites where operators must issue two-way audio commands within seconds of detection, even minor latency spikes compromise response effectiveness. Consistent sub-second delivery should be the design target, not an afterthought.
What Redundancy Measures Protect Against Network Failures?
The redundancy measures that protect against network failures include dual network paths, automatic failover mechanisms, and local edge storage. No single cable cut or switch failure should take an entire camera zone offline.
Effective redundancy strategies include:
- Dual-path network topology with primary and secondary routes to the monitoring center.
- Automatic failover switching that reroutes traffic when a primary link drops.
- On-camera or NVR-based edge recording that buffers footage locally during outages.
- Uninterruptible power supplies (UPS) at switch locations and camera clusters.
- Cellular or satellite backup links for remote sites lacking redundant wired connections.
Redundancy planning often receives less budget attention than cameras or analytics, yet a network failure during a critical event renders every upstream investment useless. With reliable connectivity established, seasonal and environmental factors become the next variable to manage.
How Do Seasonal and Environmental Conditions Affect Thermal Camera Performance?
Seasonal and environmental conditions affect thermal camera performance by altering the temperature differential between targets and their surroundings. Summer heat, winter cold, and atmospheric moisture each present distinct challenges covered below.
How Does Extreme Heat Reduce Thermal Contrast in Summer?
Extreme heat reduces thermal contrast in summer because ambient surface temperatures rise closer to human body temperature, narrowing the differential that thermal cameras rely on to distinguish targets from backgrounds. Pavement, rooftops, and metal structures absorb solar radiation throughout the day, creating a uniformly warm scene where people and vehicles blend into the surroundings. This effect peaks during late afternoon when stored heat radiates back. Operators can compensate by adjusting gain settings, scheduling sensitivity profiles for daytime hours, or pairing thermal feeds with visible-light cameras. For most perimeter deployments, summer heat is the single most underestimated threat to reliable detection.
How Do Cold Weather Conditions Impact Thermal Detection Accuracy?
Cold weather conditions impact thermal detection accuracy by increasing thermal contrast, which generally improves target visibility. A human body at 37°C stands out sharply against a winter landscape near or below freezing. However, extreme cold introduces other risks: lens fogging from rapid temperature shifts, condensation on housings, and battery or electronics strain in uncooled sensors. Wind chill can also cool exposed skin on intruders, slightly reducing their thermal signature at longer ranges. Selecting cameras rated for the site’s minimum operating temperature and using heated enclosures prevents these cold-weather failures from undermining what is otherwise the best season for thermal detection.
What Effect Do Rain, Fog, and Humidity Have on Thermal Imaging?
Rain, fog, and humidity degrade thermal imaging by scattering and absorbing infrared radiation before it reaches the sensor. According to Pixfra, humidity levels create subtle but significant effects on thermal imaging performance by absorbing infrared radiation in the atmospheric path. Heavy rain and dense fog shorten effective detection range because water droplets scatter long-wave infrared energy. High humidity negatively affects most thermal units, though some specialized units are engineered to handle these conditions without performance loss. Practical countermeasures include:
- Shortening camera spacing to reduce atmospheric path length.
- Using higher-sensitivity sensors (NETD below 40 mK) to compensate for signal attenuation.
- Pairing thermal cameras with radar for redundant detection during severe weather.
Understanding these environmental variables ensures thermal deployments stay effective year-round, which directly influences how maintenance schedules should be structured.
What Common Mistakes Should You Avoid When Deploying Thermal Cameras?
Common mistakes when deploying thermal cameras include poor placement near heat sources, mismatched lens selection, and skipping scene-based calibration. Each of these errors directly undermines detection accuracy.
Why Does Placing Thermal Cameras Near Heat Sources Cause Problems?
Placing thermal cameras near heat sources causes problems because radiated energy from nearby equipment floods the sensor’s field of view, masking the subtle temperature differences that indicate human or vehicle activity. According to FLIR, a common mistake in thermography is positioning cameras near HVAC vents or exhaust pipes, which creates thermal clutter that overwhelms the scene. This background noise triggers constant false alerts, desensitizes operators, and buries genuine threats in a stream of meaningless notifications. Even well-calibrated analytics struggle to distinguish intruders when ambient thermal signatures are unstable. Mounting cameras at least several meters from heat-emitting infrastructure is one of the simplest yet most frequently overlooked steps in any deployment.
How Does Incorrect Lens Selection Undermine Detection Goals?
Incorrect lens selection undermines detection goals by creating a mismatch between the camera’s field of view and the required identification distance. According to Vyoptics, choosing the wrong lens can result in either too narrow a field of view or insufficient magnification for the desired detection range. A wide-angle lens may cover a broad area but render distant figures too small for classification, while a telephoto lens magnifies targets effectively yet leaves large blind spots between cameras. Matching focal length to the specific zone each camera covers, whether short-range entry points or long-range perimeter stretches, is essential before installation begins.
Why Is Skipping Scene-Based Calibration a Costly Oversight?
Skipping scene-based calibration is a costly oversight because factory-default settings rarely account for the unique thermal profile of each deployment site. Temperature baselines shift with local terrain, nearby structures, and seasonal conditions. Without site-specific calibration, detection zones misalign with actual threat corridors, sensitivity thresholds trigger alerts on harmless heat signatures, and operators lose confidence in the system’s reliability. Performing calibration after installation, then recalibrating as environmental conditions change, ensures detection zones and alarm thresholds reflect real-world conditions rather than generic assumptions. Proper calibration transforms a thermal camera from an expensive sensor into a reliable security tool.
How Should You Maintain and Test Thermal Cameras After Installation?
You should maintain and test thermal cameras after installation through scheduled cleaning, periodic recalibration of detection zones, and structured field-testing protocols. The following subsections cover routine maintenance, recalibration frequency, and real-world validation methods.
What Routine Maintenance Schedule Keeps Thermal Cameras Reliable?
A routine maintenance schedule keeps thermal cameras reliable by combining regular cleaning, firmware updates, and physical inspections at defined intervals. According to IndustrySearch, routine maintenance for thermal cameras should include periodic cleaning of lenses and housings to maintain optimal image quality.
A practical maintenance schedule includes:
- Monthly: Clean germanium lenses with lint-free cloths and inspect housings for moisture ingress or debris buildup.
- Quarterly: Verify firmware versions, check network connections, and confirm that AI analytics rules remain properly configured.
- Biannually: Inspect mounting hardware for corrosion or loosening, test weatherproof seals, and review system logs for recurring error patterns.
- Annually: Conduct a full system health audit covering power supply stability, cable integrity, and sensor performance benchmarks.
Skipping even basic lens cleaning is one of the fastest ways to degrade detection accuracy without realizing it, since dirt accumulation happens gradually enough to go unnoticed during daily monitoring.
How Often Should You Recalibrate Thermal Detection Zones?
You should recalibrate thermal detection zones at least once per season, or roughly every three months. Seasonal temperature shifts alter the thermal baseline of a scene, which means detection zones configured in winter may generate excessive false alerts in summer when ambient temperatures compress thermal contrast.
Recalibration should also occur after any of the following events:
- Landscape changes: New construction, vegetation growth, or removal of structures near the camera’s field of view.
- Camera repositioning: Even minor adjustments to angle or mounting height require zone verification.
- Firmware or analytics updates: Software changes can reset or alter threshold parameters.
Each recalibration session should include adjusting temperature thresholds, verifying tripwire and region-of-interest boundaries, and confirming that the AI classification layer still correctly distinguishes people and vehicles from environmental heat sources.
What Testing Protocols Validate Real-World Thermal Detection Accuracy?
Testing protocols that validate real-world thermal detection accuracy involve controlled walk-tests, scenario simulations, and performance benchmarking against documented baselines. These tests confirm that the system detects actual threats under the conditions it was designed for.
Effective field-testing includes:
- Scheduled walk-tests: Have personnel approach from multiple angles, distances, and speeds during day and night conditions to verify detection consistency.
- Blind-spot mapping: Walk the full perimeter boundary to identify any gaps between adjacent camera fields of view.
- Environmental stress tests: Test during rain, fog, and peak heat to measure performance degradation relative to baseline readings.
- Alert-to-response timing: Measure the elapsed time from thermal alert generation to operator acknowledgment in the monitoring center.
Document all test results with timestamps and conditions so future audits can track performance trends over time. With a validated testing protocol in place, integrating thermal feeds into a professional live monitoring workflow becomes far more effective.
How Can AI-Powered Live Video Monitoring Enhance Thermal Camera Deployments?
AI-powered live video monitoring enhances thermal camera deployments by pairing automated threat detection with trained human operators who verify and respond to alerts instantly. The following sections cover real-time response capabilities and key deployment takeaways.
Can Pioneer Security’s Live Video Guards Respond to Thermal Camera Alerts in Real Time?
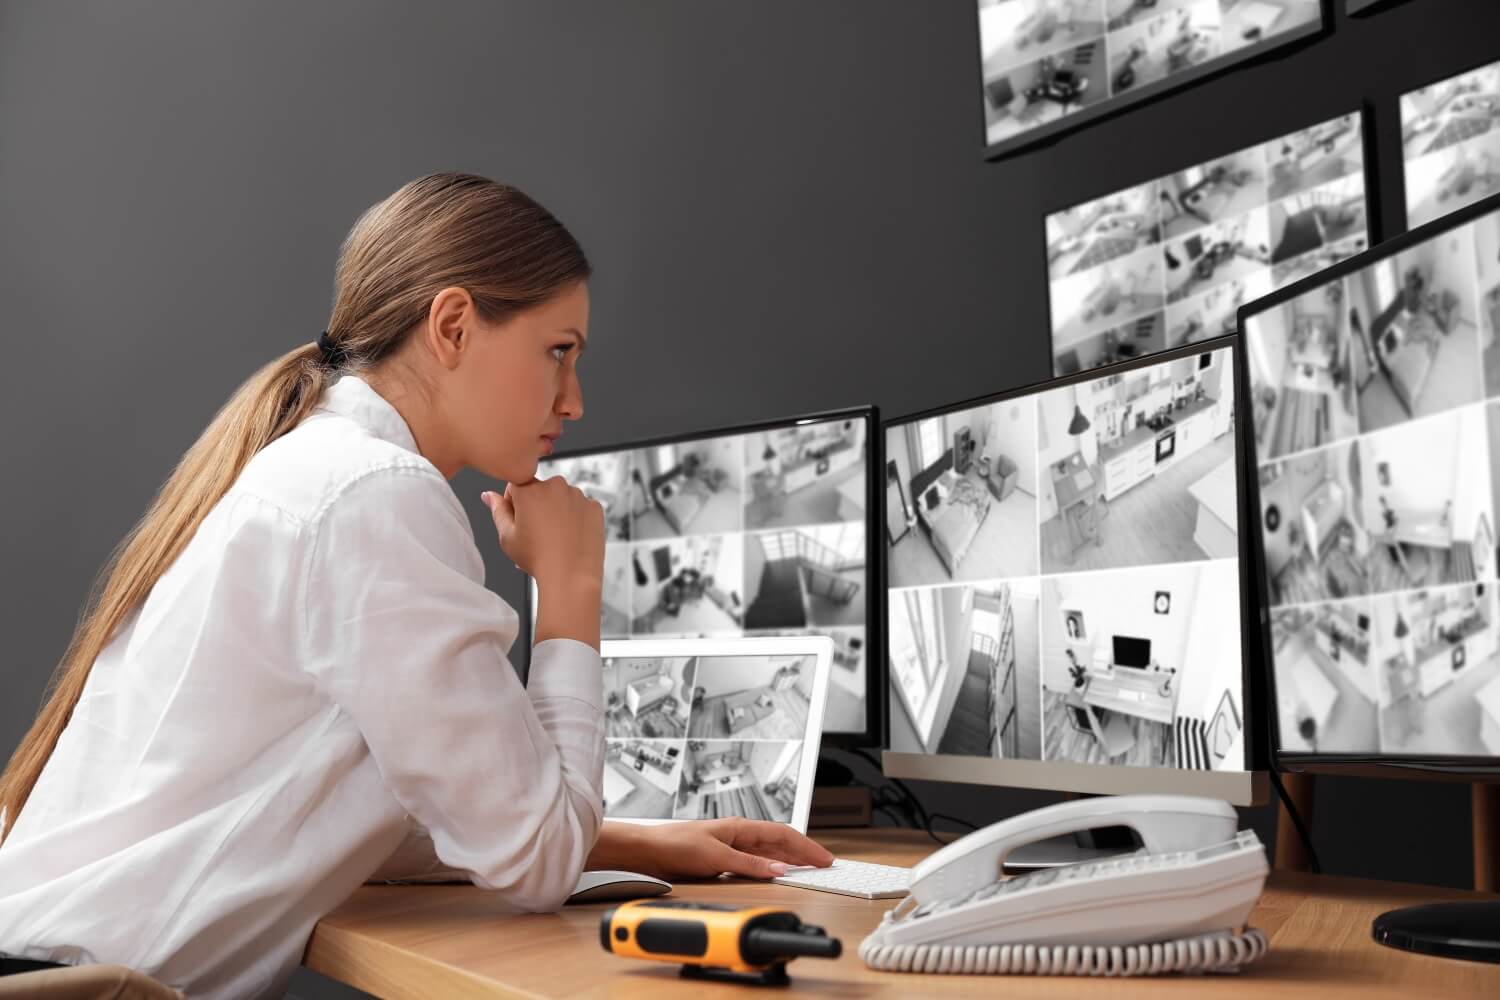
Yes, Pioneer Security’s live video guards can respond to thermal camera alerts in real time. Pioneer Security stations US-based operators in professional monitoring centers where AI-filtered thermal alerts arrive the moment a verified threat is detected. These live video guards use 2-way audio to directly address intruders before they breach a property, turning passive detection into active intervention.
According to TechPro Security, AI false alarm reduction rates of 70–90% compared to legacy motion-detection systems allow operators to respond to every real alert with higher confidence. Pioneer Security’s AI-powered PoE hubs, equipped with Nvidia GPUs, handle the classification layer so guards focus exclusively on genuine incidents. This combination of thermal imaging, AI filtering, and human decision-making represents the most effective approach to perimeter protection available today.
What Are the Key Takeaways About Deploying Thermal Cameras in Live Monitoring?
The key takeaways about deploying thermal cameras in live monitoring center on strategic planning, proper integration, and ongoing maintenance:
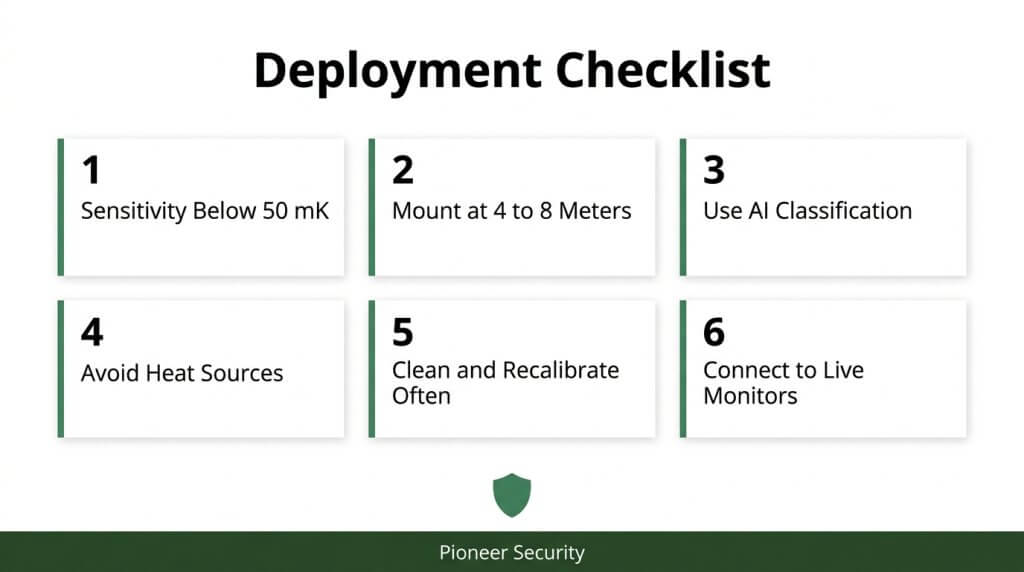
- Select thermal cameras with sensitivity ratings below 50 mK and resolution appropriate to your detection distance.
- Mount cameras at optimal heights (4–8 meters) with fields of view perpendicular to likely intruder movement.
- Integrate AI-powered analytics to classify objects before triggering alerts, dramatically reducing false positives.
- Avoid placing cameras near heat sources like HVAC vents or exhaust pipes that create thermal clutter.
- Establish routine lens cleaning, recalibration schedules, and real-world detection testing after installation.
- Connect thermal feeds to a professionally staffed live monitoring center for immediate human verification and response.
Thermal cameras provide the detection layer; AI provides the filtering layer; trained human operators provide the response layer. When all three work together, security teams achieve reliable 24/7 protection regardless of lighting or weather conditions. Pioneer Security combines these elements into a single integrated service, delivering proactive protection that stops crime before it starts.